
Advanced Computing Visualization Room
About
The IST/ULisboa Advanced Computing Visualization Room is a working point for the scientific community associated with IST/ULisboa requiring high-definition data visualization facilities and offering a highly interactive collaborative environment. Typical applications include the visualization of High Performance Computing simulations, big data visualization as well as any other application requiring high resolution performance and collaborative environment. The infrastructure is a project funded by FCCN/FCT in the scope of ULisboa/IST Center of Competence and Visualization in Advanced Computing.
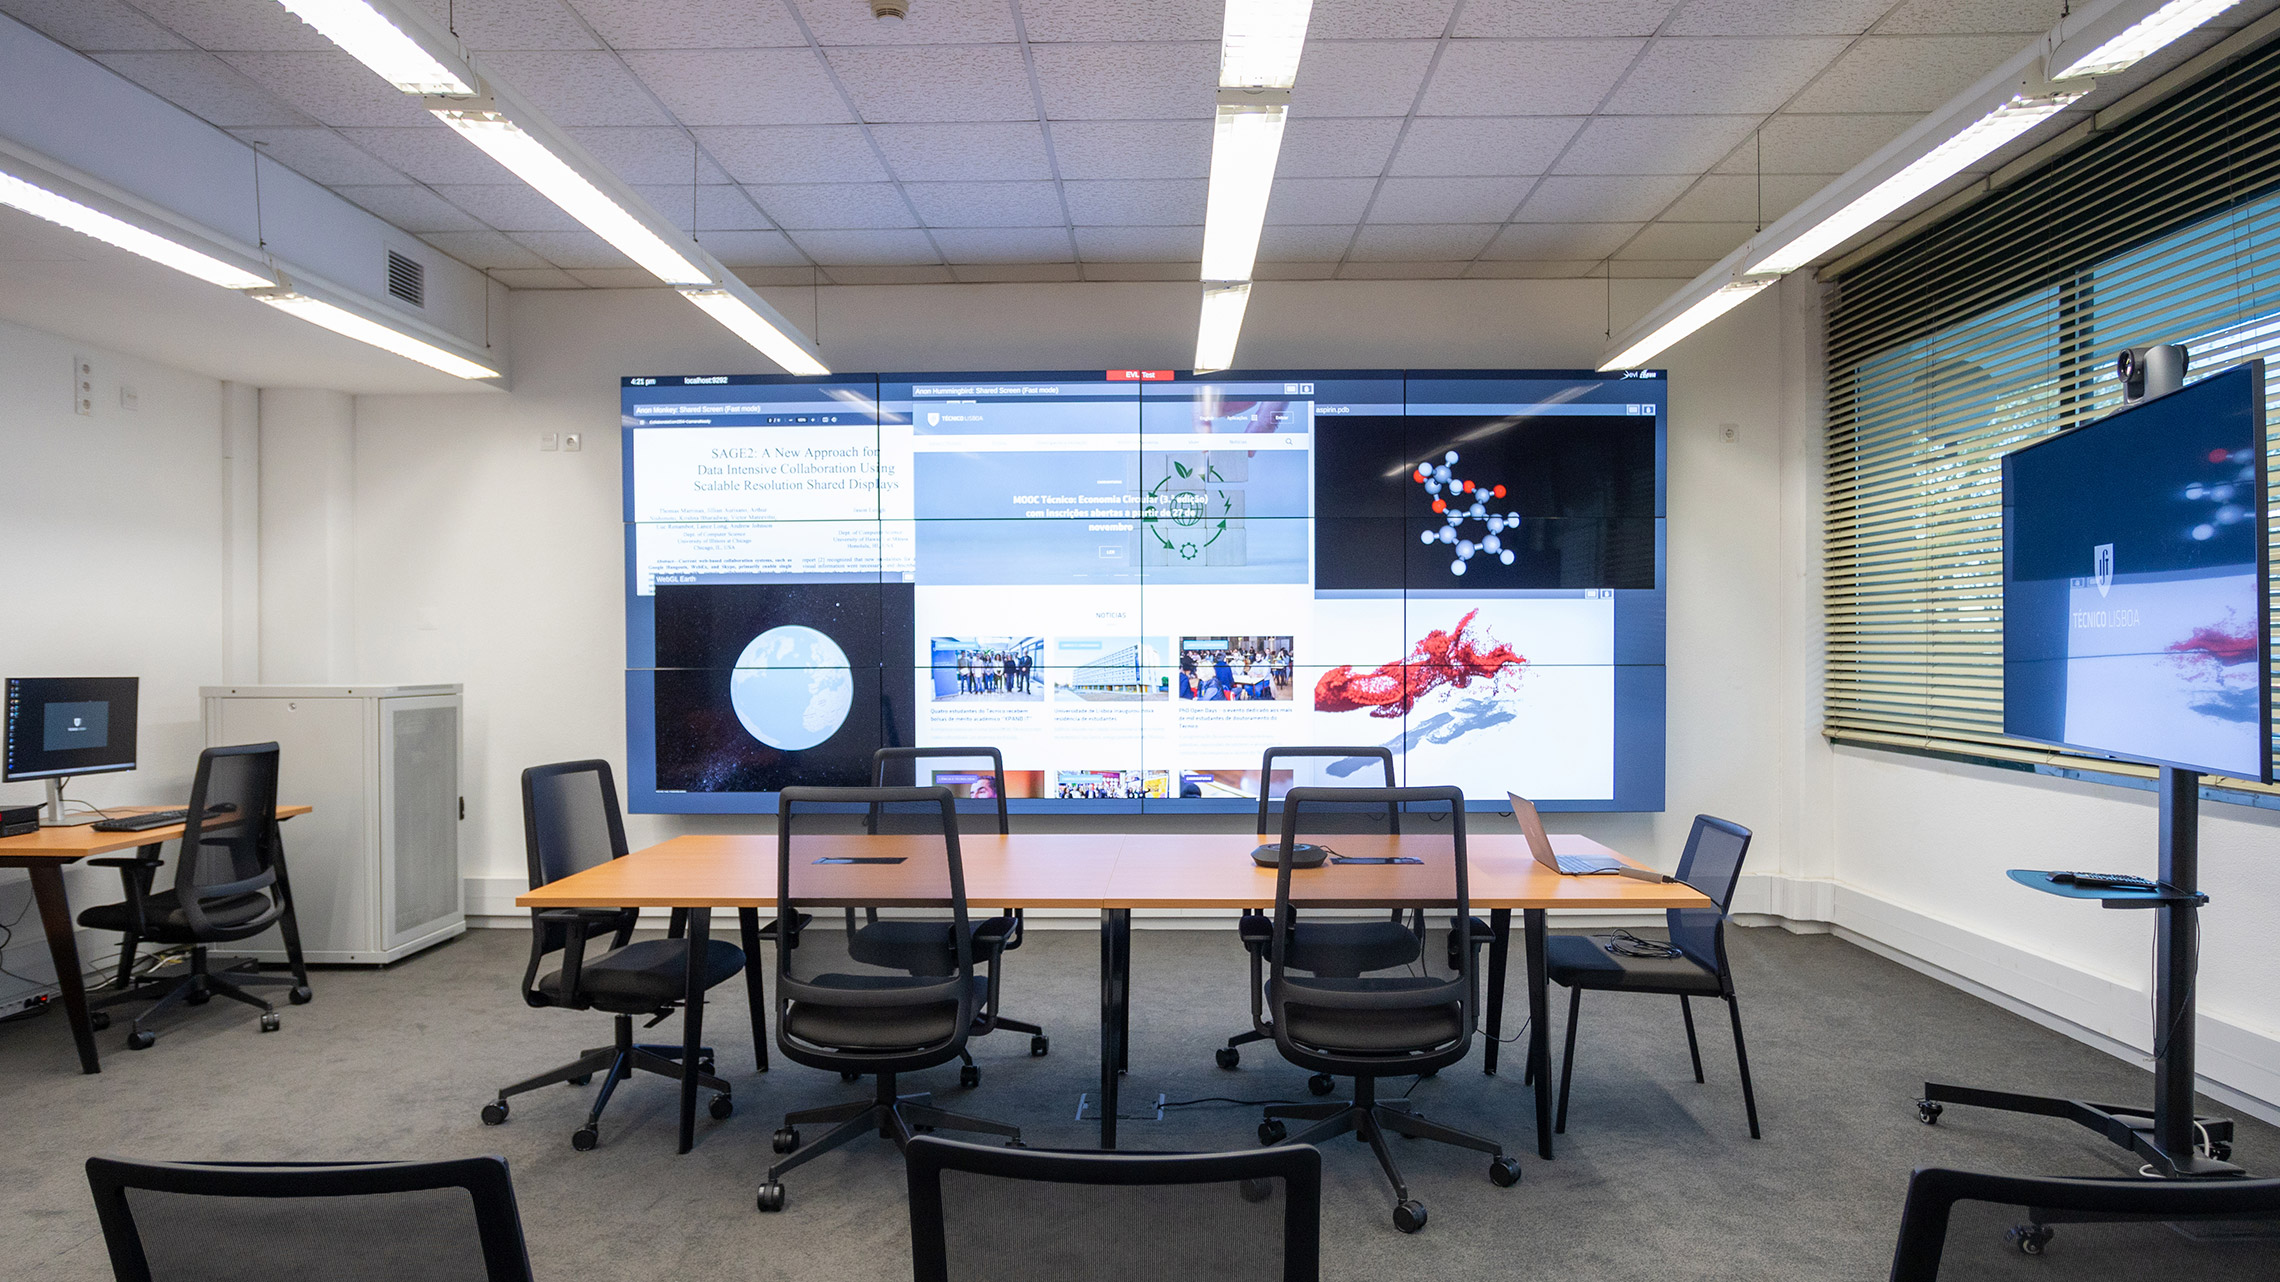
The main room component is a video wall composed by twelve 55” monitors mounted in a 4×3 configuration. Each monitor is connected to a display controller node supported by a NUC with a core I7 processor, with 16GB de RAM and a 256GB SSD, all interconnected by a 1Gbit/s local network. The central controller node is a high performance workstation based on an Intel Core I9 processor, with 64GB RAM and 1TB of data storage. A 4K monitor, keyboard and mouse are available for local operation of the workstation.
Further to the videowall, the room features two multipurpose 65” 4K monitors (the first one wall mounted, the second one on a mobile stand), two PTZ cameras and one high quality speakerphone, therefore providing several possible configurations for collaborative projects, working meetings and video conference.
Location
The IST/ULisboa Advanced Computing Visualization Room is located in room V0.01, in the ground floor of the Civil Engineering Building. The room is accessible by mobility impaired users.
Reservation and access
In order to reserve the room, please send an e-mail to si@tecnico.ulisboa.pt with day, time and purpose. A full-time faculty or researcher should be fully responsible for the room reservation, as well as for the correct handling, maintenance and operation of all equipment.
The reservation must identify the user in charge, including his/her Tecnico-id, as well as the estimated number of simultaneous users (students, guests, etc), in order for the access to be provided.
The opening of the room must be requested to the security or at the reception of the Civil Engineering Building by the user in charge of the reservation.
IMPORTANT NOTICES:
- When closing the door at the end of the session, please confirm that it is locked and secured.
- Please be sure to switch off all equipment, as well as roll and strap any used cables. Please leave the room as you would like to find it :-).
Technical support
For first time users, it is possible to request a demo/tutorial session, which must be scheduled with DSI according to technical availability, by sending an email to si@tecnico.ulisboa.pt.pt.
Video Wall operation
- Starting SAGE 2
Login in the room workstation located near the wall mounted 65” monitor using your Tecnico-ID and password. Start the video wall clicking on the link “Start SAGE2” available on the desktop. This will automatically switch on all 12 monitors and the SAGE2 software. - Using SAGE 2
Click on the ‘SAGE2 Control’ link on the Desktop, which will take you to the webpage where you’ll be able to open applications in the video wall. The main options available are the following:- Opening files such as PDFs, video or images, by dragging them into the main panel. Depending on the size, they may take a few seconds to load.
- Sharing your screen with the ‘Screen Sharing’ button on the bottom bar.
- Opening a browser with the ‘Browser’ button, however keep in mind this option works best for static websites and isn’t suited for pages like YouTube.
- Opening other apps, such as a notepad or a map, which are available in the ‘App Launcher’ button.
To control the apps you opened, click on the ‘SAGE2 Pointer’ button, which will make you control the mouse pointer on the video wall. You can also use this to resize windows by dragging the square on the bottom right corner of each window.
For further information, please check SAGE 2 user documentation available at https://adv-comp-istul.tecnico.ulisboa.pt/SAGE2Userdocumentation.pdf.
- Switching off SAGE 2 and the monitors
Just activate the link “Stop SAGE2” available on the workstation desktop. This will stop SAGE2. The video wall monitors will automatically switch off a few seconds later due to the lack of HDMI signal.
External 65” monitors
- Wall mounted monitor
The wall mounted monitor at left operates as an extension of the 4K Workstation monitor, which is positioned at the left of the Workstation monitor. In order to use it, just switch it on (using the central button at the bottom under the screen or the LG remote) and login in the workstation using your Tecnico-ID credentials. Open any desired window or application to display and drag it to the left of the desktop screen. The window will be visible on the 65” monitor. You may maximize the window for convenience. - Mobile stand monitor
The 65” monitor in the mobile stand at right can be used for presentations or any other similar media use. Just switch on the monitor (using the central button at the bottom under the screen or the LG remote) and plug the HDMI cable available on the stand to any laptop.
Video conference operation
- Standard Room Configuration
In the standard room configuration the video conference is supported by the left camera and left monitor (wall mounted), by the table speakerphone and the room workstation .In order to start the video conference, login in the workstation using your Tecnico-ID credentials. In order to use the Zoom, if you are using the session just access https://videoconf-colibri.zoom.us/ and start the desired session. If you are the guest, just activate the link you received. You may also start the Zoom application activating the link available on the workstation desktop. By default, the left camera and speakerphone must be activated, but if required you may have to select the Aver Cam 520 Prod for video and the Aver 540 speakerphone as audio and microphone. This selection is available at the the bottom left of the Zoom window, on the up arrows at the right of the microphone and camera icons.After activating the session, just drag the Zoom window to the left of the workstation screen to become available on the 65” monitor.
You may, of course, use any other user video-conference application provided that it is compatible with the available hardware. Please test compatibility in advance and send an email to si@tecnico.ulisboa.pt if the installation of any additional video conference software is required.
- User laptop configuration
The video conference can be based on your own laptop instead of the room workstation. In this case, the easiest configuration is to use the camera and monitor available on the mobile stand at the right. Just connect the HDMI monitor cable to your laptop to use it as an external monitor. To connect the speakerphone, use the USB-A cable, which must be rolled and strapped under the central working table and connect it to one USB-A port of your computer. To connect the camera, connect also to your laptop the rolled and strapped USB-A cable available in the mobile stand, which is connected to the camera. If you only have one USB-A port available on your laptop, you may use the USB-A hub available on the mobile stand to combine the speakerphone and camera USB cables.Operate your video conference as usual. The right camera and speakerphone must be activated by default on starting the video conference equipment, otherwise you may have to select the Aver Cam 520 Prod for video and the Aver 540 speakerphone as audio and microphone in the video conference software. When using Zoom, this selection is available at the the bottom left of the Zoom window, on the up arrows at the right of the microphone and camera icons.Before leaving the room, please be sure to roll and strap all cables as they were at the start of your session.